Samsung Banner sticky Advertisement
  • Home
  • Articles
  • How to check the mileage of your bike? Reviews

How to check the mileage of your bike? Reviews

13th January 2021
"No matter if your speed effort might be low but your mileage should be proper!"

Every day, it becomes much more important to keep track of the fuel consumption of your bike as fuel becomes costly day by day. When investing in a bike, the mileage of a bike is one of the major concerns. It is advised to review the mileage of your bikes at least monthly or how much fuel they use. There may be some problems with your motorcycle as the fuel consumption of your bike rises, and some may be very severe problems, such as broken spark plugs or clogged fuel. Your running, accelerating or rough throttling style may also be the cause. Now, whatever the cause, one of the good things to do is to measure the mileage of your bike, and there are different ways to do so.

bike

Here, we tell you five quick steps to correctly measure your bike's mileage.

1: Ask the fuel pump worker to select the slowest setting for the fuel filler. Fill the petrol up to the fuel tank's neck and make an exact record of the fuel volume.

2: Before you quit the fuel station, set the trip meter to 0.

3: Ride your motorcycle or scooter for about 100 km.

4: Head to the pump for fuel. Phase Number Repeat 1.

5: Measure mileage by dividing the number of liters by 100kms.

Alternatively,

A measurement bottle that is directly attached to the carburetor hanging from the handlebar or taped to the fuel tank is used for this process.

Here, with the measuring bottle with fuel (suppose 500 ml) in it, the fuel pipe is connected to the carburetor and the trip meter is set to 0 and the bike is made to operate until the fuel in this bottle exceeds 100 ml.

The trip meter is noted down and is separated by 0.4 liters or whatever quantity you need. This final reading provides the bike's mileage.

This approach is fairly precise and relies just on the driving situation you had when you were calculating it, so just be in your usual style of travel.

Also Read:

5 BIKE CARE AND MAINTENANCE TIPS TO KEEP YOUR BIKE FOREVER NEW

TOP 5 200CC BIKES IN NEPAL IN 2020 | UPDATED PRICE

TYPES OF MOTORCYCLES 2020

TOP 5 BEST SCOOTERS IN NEPAL 2020 | PRICE, SPECS

TOP 5 PICKUP TRUCKS IN NEPAL | SPECIFICATIONS AND PRICE IN NEPAL

TOP 5 SUVS IN NEPAL IN 2020 | UPDATED PRICE

Compiled by : Upasana Poudel Upasana Poudel

How to take care of your car during lockdown ?

6th April 2020
"You can’t get out and with that, your bikes and cars are locked down with you."

How is Coronavirus lockdown treating you? You can’t get out and with that, your bikes and cars are locked down with you. Here we have come with four tips to protect your automobiles this Quarantine season:

Tips to take care of your car and other vehicles during lockdown how to maintain car during lockdown

  1. Start the engine for at least ten minutes a day how to take care of your car engine

When your vehicle is ideal, the engine gets cold. It is advised to switch it on for at least ten minutes a day to avoid starting malfunction later.

car engine opened

  1. Avoid direct sunlight on your Vehicle how to take care of your car paint

Try parking your vehicle in the shade. The direct sunlight tends to fade the paints and makes your vehicle look old.

car in sunlight

  1. Cover your vehicle all the time how to take care of your car paint

Covering your vehicle when it is ideal can be a good way to protect the shine of the paint and also protect the vehicle from dust and dirt.

covered car

  1. Leave an inch of the window open car maintenance tips

When your vehicle is locked down for a longer period of time, the air doesn’t pass and foul smell is the result. You can prevent the foul smell by leaving an inch of the window opens on each door.

Leave an inch of the window open


Also Read :

5 BIKE CARE AND MAINTENANCE TIPS TO KEEP YOUR BIKE FOREVER NEW

WHAT IS HILL START ASSIST? HOW DOES IT WORK ?

ENGINE BRAKING BETTER THAN YOUR FRICTION BRAKES? PROS AND CONS

TIPS TO SAVE PETROL IN BIKE

You may also like:

TDO NEPAL LAUNCH COVID-19 SELF-SCREENING APP & WEBSITE | HOW TO USE

APPLE LAUNCH COVID-19 SELF-SCREENING APP & WEBSITE | HOW TO USE

CORONAVIRUS- NEPAL BANK’S NOTICE ON FINANCIAL TRANSACTION THROUGH THE ELECTRONIC MEDIUM

VISHAL GROUP TO CONTRIBUTE NRS. 1 CRORE TO AID IN CORONA VIRUS RESPONSE IN NEPAL

COVID-19 CTI LEAGUE: CYBER-SECURITY EXPERTS COME TOGETHER TO FIGHT CORONAVIRUS RELATED HACKING

NAMECHEAP BLOCKS DOMAIN REGISTRATION WITH NAMES ‘CORONAVIRUS’, 'COVID' AND ‘VACCINE’

HOW TO FIX SLOW INTERNET CONNECTION?

HOW TO STAY SAFE WHEN TRAVELLING BY CAR DURING THE CORONAVIRUS PANDEMIC

CORONAVIRUS- JACK MA FOUNDATION AND ALIBABA FOUNDATION DONATE MEDICAL SUPPLIES TO 10 MORE ASIAN NATIONS

JACK MA FOUNDATION PUBLISHES HANDBOOK, SHARES CHINA’S EXPERIENCE IN BATTLING COVID-19


  • Tags :
Compiled by : Debashish S Neupane Debashish S Neupane

How to Fix a Stuck Ignition Switch?

22nd December 2020
"Be prepared for any situation!"

Due to rain or loosened buttons, ignition switches get stuck several times. It is recommended to use dry lubrication instead of having it patched with wet lubricants like lubricating oil. The explanation is that at that point in time, wet lubrication will resolve the issue but provide long-term demerits. The dirt and dust that could fill up in your ignition switch are attracted by wet lubricants and you will finally be left with no choice but to repair the system.

Today, in this post, we offer you easy advice about how to recover the motion of the ignition switch on your motorcycle.

The instructions are here:

1. Take a cutter and a pencil.

2. Near the ignition switch, take the pencil in such a way that the tip is held just above the switch's opening.

3. Rub the graphite portion of the pencil gently with the aid of a cutter, so that the powdered graphite slides straight through the ignition switch.

4. For some time, repeat this until you know that a reasonable amount of material has come through the crack.


Alternate procedure:

1. Label any lines on your key with a pencil in case you don't want to do the above process.

2. Making these lines darker by repeated pencil activity on the key.


Alternate procedure:

Try spraying WD-40 into the ignition lock a little bit. A thin straw that can fit (or nearly fit) into the gap between your key and the ignition lock should come with the can. Often, by softly wiggling it, this additional lubrication would be enough to allow the key to be removed.

Also Read:

5 BIKE CARE AND MAINTENANCE TIPS TO KEEP YOUR BIKE FOREVER NEW

CROSSFIRE GR7: SPECIFICATION AND PRICE IN NEPAL | 2019

TIPS TO SAVE PETROL IN BIKE | MINIMIZE FUEL CONSUMPTION

ENGINE BRAKING BETTER THAN YOUR FRICTION BRAKES? PROS AND CONS

HOW TO TAKE CARE OF YOUR CAR DURING LOCKDOWN?

ELECTRIC VEHICLES | CARS | BIKES: ADVANTAGES AND DISADVANTAGES

Compiled by : Upasana Poudel Upasana Poudel

How to clean Motorcycle Helmet?

3rd January 2021
"It rarely takes more than a few strategic tugs to remove the internal liner and cheek pads to start the cleaning process."

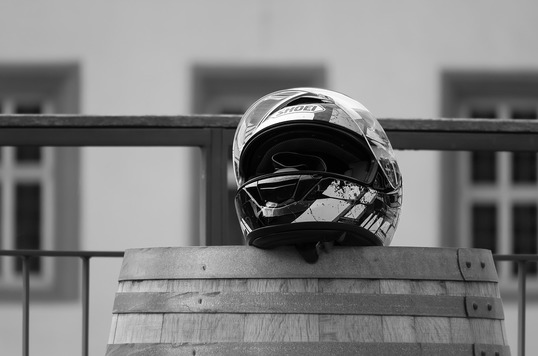
Motorcycle helmets are supposed to be used all the time-rain, shine, mud pits, and heatwaves. It has the most critical job (protecting the skull and its contents). Knowing how to clean and preserve your motorcycle helmet will not only protect you from having a dank inner lining around your ears, it will also help to prolong your helmet's lifespan and get rid of stinky smell. Some steps on how to clean a motorcycle helmet are as follows:

clean-helmet

Step 1: Motorcycle helmet cleaning materials

Getting things in order from the beginning, as with any production, can go a long way towards making the best use of your time when cleaning a motorcycle helmet. In order to clean the helmet, you should have a soft towel, toothbrush, shampoo, and warm water. These materials will help you to clean your helmet like a pro.

Step 2: Remove any electronics and external accessories

You should make sure to remove all internal electrical devices such as speakers, antennas, batteries, and the Bluetooth communicator units they mount before you wash a motorcycle helmet. In addition, whether you're working on a dual-sport or off-road helmet that has a peak, removing it and washing it separately is much simpler.


Step 3: Remove the helmet's interior

Although many companies have somewhat different styles, it rarely takes more than a few strategic tugs to remove the internal liner and cheek pads. Comfort pads and liners are attached with snaps in most situations, but others use hook-and-loop fabrics or even magnets. Be sure to check the owner's manual for details. Put these on the side until you have cut the cheek pads and mainliner.


Step 4: Clean the interior lining

The interior of a motorcycle helmet is always the one that needs to be cleaned the most. The padding of your motorcycle helmet soaks up lots of grime, from facial sweat to hair spray. Fill a sink, shower, or bucket with warm water and baby shampoo while washing the lining of your motorcycle helmet, and then dunk, rinse, and massage each piece of your helmet liner in the soapy water. For this job, baby shampoo works well as it is super soft, but also clearly formulated to scrub away sweat and hair oil. Let the helmet liner and cheek pads air dry when done.

Step 5: Clean the motorcycle helmet's exterior

Take the face shield off and set it aside after removing the damp rag that you put on the helmet. To gently work your way around the surface of the helmet, use a new, damp soft towel to brush away any remaining soil. Always make careful to use only warm water when washing your motorcycle helmet. The exterior of your helmet can be affected by some solvents and cleaning solutions. For hard-to-reach places, the toothbrush will come in handy.

Step 6: Clean the face shield

Most typical face shields have a protective coating of some sort. For that cause, and much like the outside of your helmet itself, when cleaning a motorcycle face shield, you can never use anything other than warm water. Ultimately, just using a damp soft towel and softly massaging away any dirt, grit, or smudges is the easiest way to wash a motorcycle face mask. As for the outside of the helmet, leaving a damp rag draped over the face shield for several minutes softens the remnants of the crusty bug and renders it soft, and makes the job easier.

Step 7: Wipe down the internal sun shield

If there is an internal sun shield on your helmet, it is actually not very dusty. Fast sprits of water and wipe down with a microfiber towel will do the trick if the drop-down visor has become a little dirty over time, though. It is better to keep it in place when washing unless you are stubborn in your determination to remove the whole sun visor since it can be a bear to bring back into place once removed.


Step 8: Reassemble the helmet

Reassemble your helmet starting with the dry liner and cheek pads. Reattach your face shield and any other pieces that you removed prior to cleaning.         

Also Read:

BEST BUDGET FITNESS TRACKERS IN NEPAL

HOW TO FREE UP YOUR IPHONE AND ANDROID PHONE FULL SPACE

SAMSUNG MAY DISCONTINUE HIGHEND GALAXY NOTE SMARTPHONES5

ENGINE BRAKING BETTER THAN YOUR FRICTION BRAKES? PROS AND CONS

5 BIKE CARE AND MAINTENANCE TIPS TO KEEP YOUR BIKE FOREVER NEW

ELECTRIC VEHICLES | CARS | BIKES: ADVANTAGES AND DISADVANTAGES

Compiled by : Upasana Poudel Upasana Poudel